After a few days of internet troubles at work, I decided to attempt USB tethering with my Nokia N9 before Facebook withdrawal killed me (I'd browse on mobile but the only place I get signal is hanging off my desk which makes typing a bit awkward). This is a little more involved than on other platforms - if you have wifi you can use the included hotspot app, but I couldn't be bothered to walk the whole 15 minutes home to grab a wireless card. I knew that the SDK app you get when you enable developer mode (you have done this, right? Settings -> Security -> Developer Mode and hit the button) lets you set up a network over USB so you can SSH to the N9, and figured I could simply set up an SSH tunnel and proxy all my PC traffic through that. Course, it's never that easy.

First things first, you need to get the bloody thing connected. Plug it in via USB and select SDK mode. Naturally Windows won't have a driver for it despite the fact that every other USB mode works fine. You've got two choices here - you can use an unsigned driver that I hacked together from someone else's previous work on another phone, or you can use a generic Microsoft one that seems to work fine and you most likely already have. I'd go for the latter.
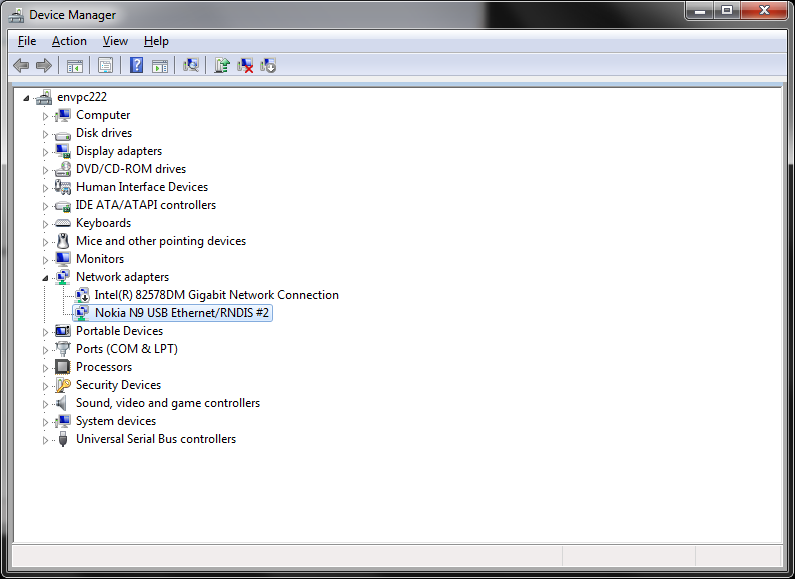
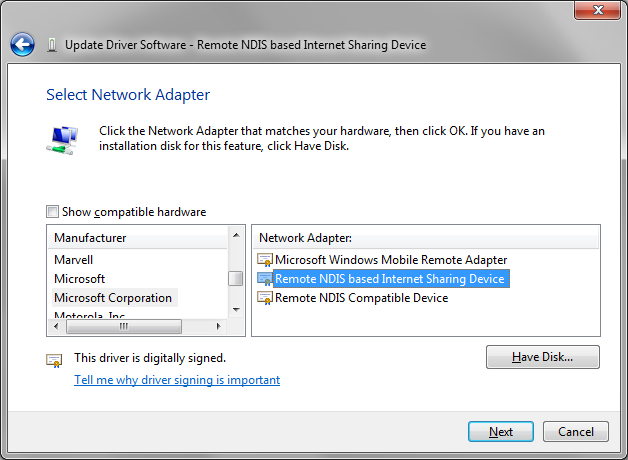
Open up Device Manager, expand Network Adapters and right click on the Nokia N9 USB Ethernet/RNDIS entry that's complaining about having no driver. Click Update Driver Software, Browse my computer, Let me pick from a list, choose Network Adapters then Microsoft Corporation, and install the Remote NDIS based Internet Sharing Device driver. It'll complain about being invalid but whatever.
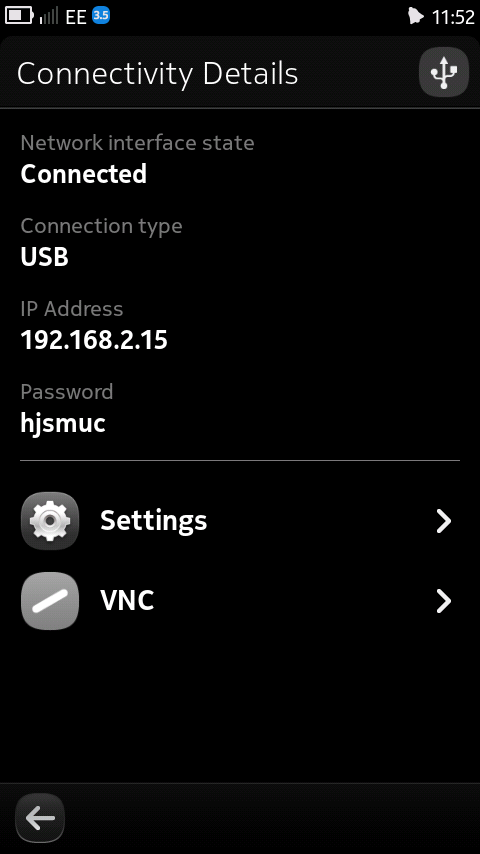
Back on the phone, open up the SDK Connectivity app and choose USB as the connection type. Note down the IP Address and password as you'll need them later. As far as I can tell you don't need the app to be open from now on.

Back to the computer. Hit Start, type View Network Connections and pick the obvious one. Right click on your shiny new network adapter, click Internet Protocol Version 4 (I don't know why I'm bothering to explain this, you have an N9 so you're probably a big nerd), click properties, then stick something similar to the above in. The IP address needs to be different from the one you noted down earlier, as long as it's on the same subnet. I went for 192.168.2.13 because why not. Subnet mask should be 255.255.255.0, and you can leave the gateway blank as it doesn't seem to make the slightest bit of difference. You can set some DNS servers (8.8.8.8 and 8.8.4.4 are Google's) but they don't do anything because everything has to go through the tunnel and by default DNS requests don't. More on that later.
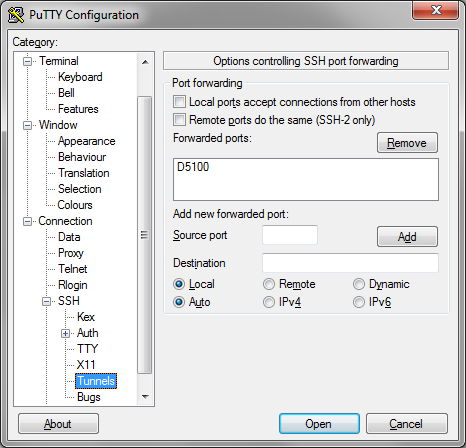
If you're lucky, Windows will now be complaining about an unidentified network with no internet access. No probs. Fire up PuTTY and set up your SSH tunnel. The IP to connect to is whatever you wrote down earlier. Go to Connection -> Data and set the auto-login username to developer (saves you tying it every time), then go to Connection -> SSH -> Tunnels. Stick your favourite number in the Source port, choose Dynamic for the Destination and click Add. Save the profile if that's what you're into, then hit Open and enter your earlier password.
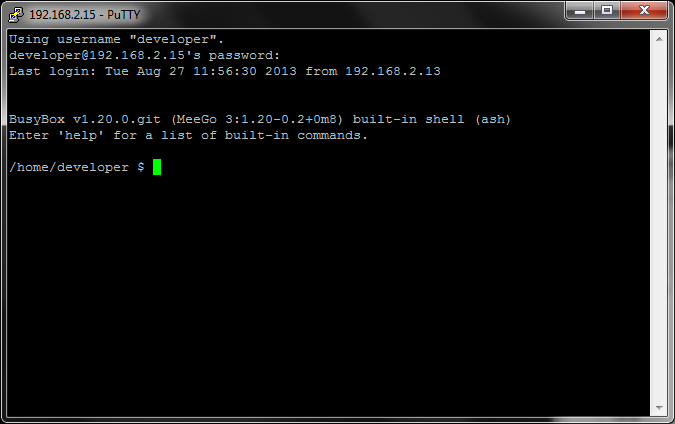
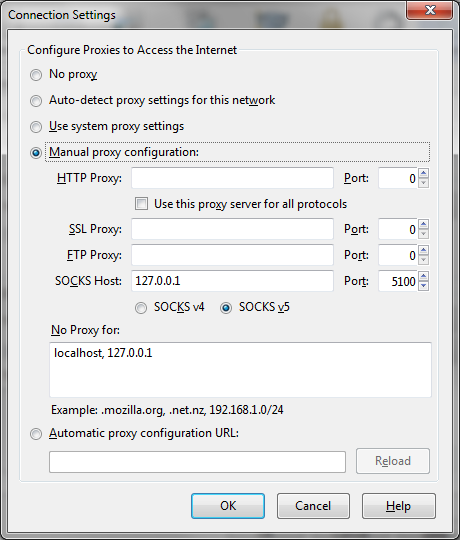
With any luck, you'll have a functioning SSH session now. Go you. Next step is to set up the browser. Due to the aforementioned DNS issues, you'll want to use something that supports sending DNS requests through the SSH tunnel - Firefox is fine, but IE and Chrome are out. Check the bottom of this page if you're desperate but I'm not that bothered. Assuming you're using Firefox, go to Options -> Advanced -> Network -> Settings and set the SOCKS proxy to 127.0.0.1 and whatever port you stuck into PuTTY.
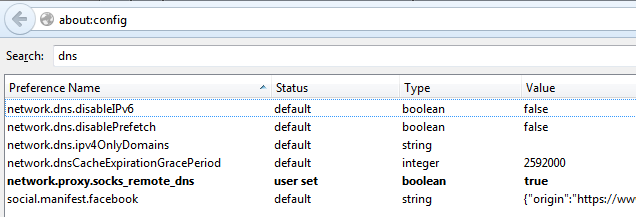
The last thing you need to do is to set up Firefox to send DNS requests through the proxy too. Go to about:config, search for dns and double click on network.proxy.socks_remote_dns to change it to true. Restart Firefox and you should be good to go.
Like I said at the start, getting USB tethering to work on the N9 is a bit more involved than you'd necessarily like it to be. That said, if you're as desperate as I am for human contact, I'm sure you won't mind. Plus once you've got the driver installed, it's a simple matter of opening up PuTTY and switching the proxy on. As always, comment or email hello at this domain with any questions!
Hello, other person here. Thanks,this got me online today! I’m still rocking an N9 in 2020. You made my day!
Incredible! That’s amazing longevity! Sadly mine died years ago but I miss it a ton. Are you still finding it fairly usable?
Yes. It’s sat in a draw for many years. Decided to start using it again after getting frustrated with social media / constant notifications etc. It’s the perfect phone for disconnecting, can do email, sms, and calls, but it can’t load many websites, which is a positive for me at the moment.
I still think the interface is the best ever on a phone. I’d love to see this on modern hardware.
That’s a great shout actually. If there’s any decent ereader software kicking about I’m tempted to dig it out and see if it can be brought back to life next time I’m offline for a couple of months 🙂
Many thanks,
So now I could use my N9 again with Windows 10 for internet connection.
Your driver work, with a trick to allow unsigned drivers.
Please note that the device manager show the N9 as a serial port !
You’re very welcome! Glad it worked for you. Shame about the constant nag about unsigned drivers but who looks at their desktop anyway? 🙂